**Hi there! Want more posts like this one? Follow me on Pinterest!
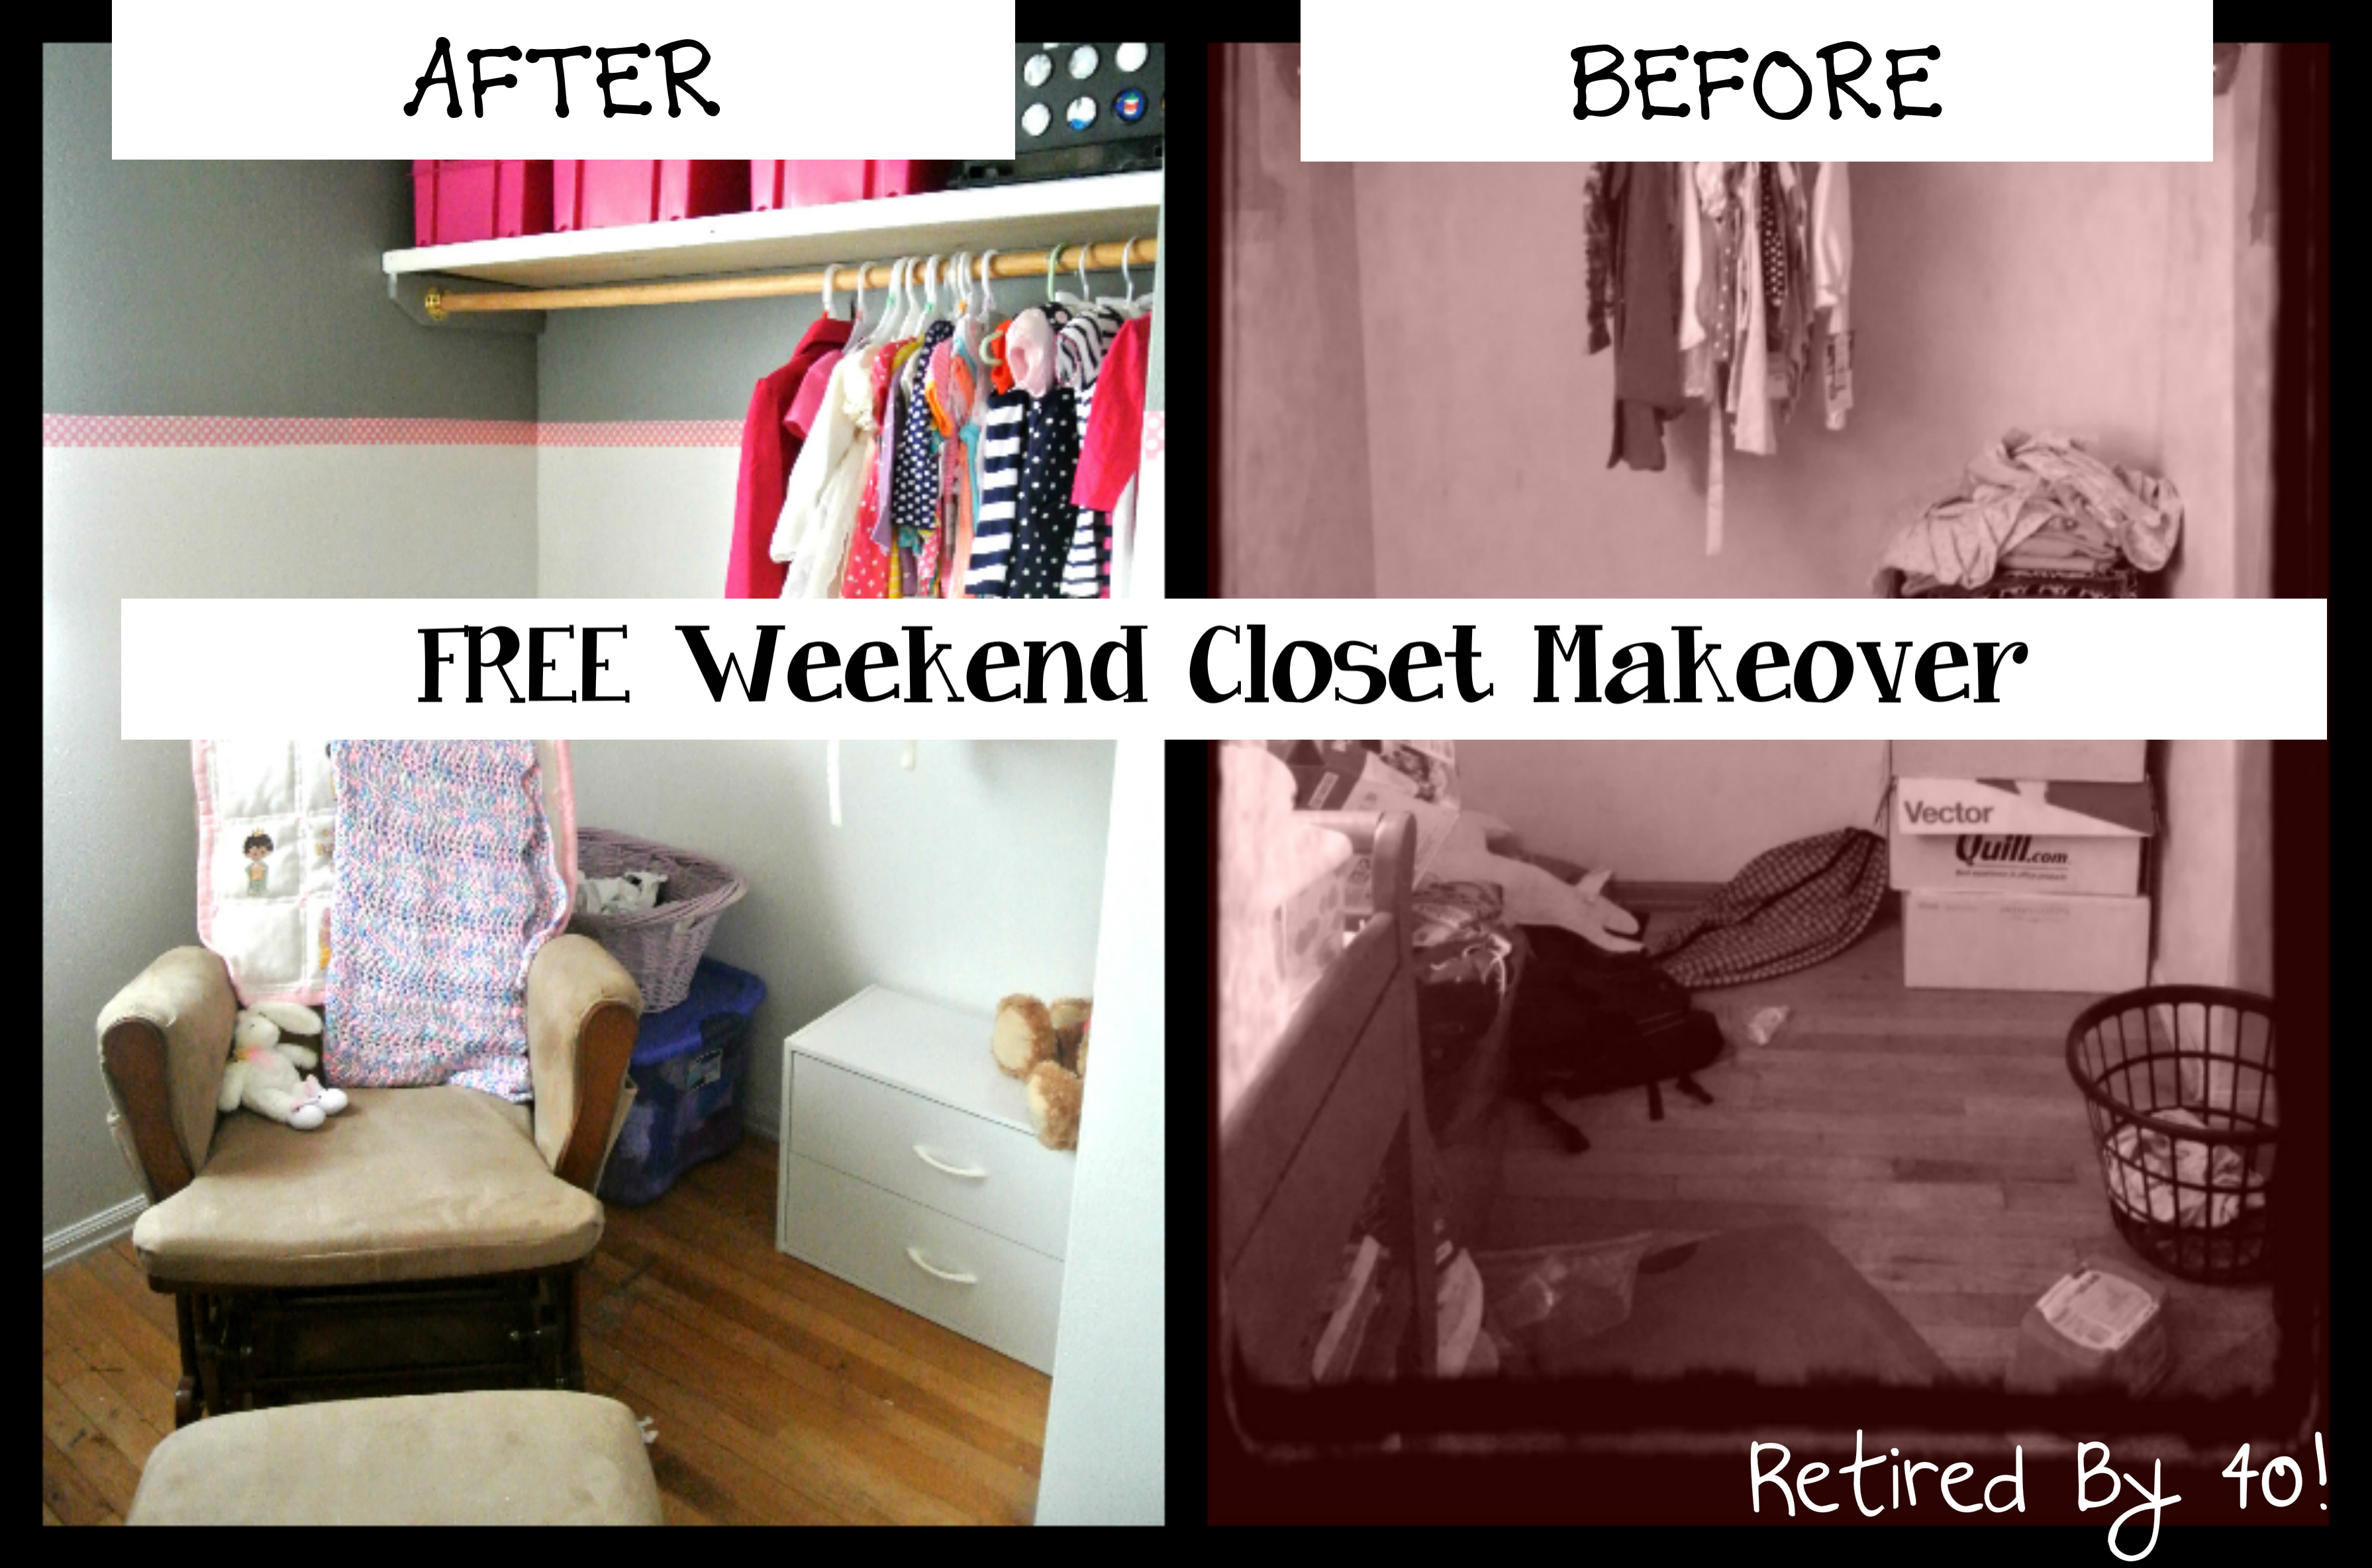
In April 2013, we bought a house that had been unoccupied for 7 years, and after 3 frantic weeks of renovations, we moved in. Then, because I was pregnant, we made putting the nursery together our first priority, and we did a pretty good job – except for the closet. This is what it looked like before – no paint, old and broken shelf, and doors that wouldn’t allow me to put storage totes in it (I had already taken to doors off when I took the photo).

I am all about shopping when things are cheapest, and with garage sale season almost upon us, redoing this closet has been on my mind so I have a place to store all of the wonderful garage sale finds! But, I was on a budget.
How did I keep my costs low?
Here was my strategy:
1. Keep it simple – I knew I didn’t need some fancy closet system. I was planning on using totes I already had for storage, as well as the existing closet rod, but we needed a plain, new shelf. Keeping it plain kept my costs low and the project simple.
2. Use what you already have on hand: I took a trip down to our basement and found paint that we already had from painting baby RB40’s room, as well as totes and the pink polka dot border left over. Additionally, I found all of the painters tape, brushes, and rollers and paint trays in our basement that we needed!
3. Return something: We couldn’t reuse the existing shelf, and I didn’t have anything on hand that would work even with paint, so I needed to find a way to pay for the new board. Well, while I was hunting in the basement, I found some switches, wire, and fuses that we bought while redoing the electrical system in our house that we never actually used. Luckily, they were still in the bag with the receipt, so we returned them for a $56 gift card. After purchasing the new shelf board ($14) and the white drawer set ($30) and tax, I still have $10 left on the gift card!
4. Be creative about organizers: Have you ever noticed how sturdy the big boxes are that diapers come in? I love them for organizers! They’re not pictured here, but I simply cut off the flaps and then staple wrapping paper or fabric the the outside – or even just the front to clean up the appearance and make them look fancier than they are! This way, they are basically free, and you know how I love free :-)
We had the home improvement store cut the shelf board to size and painted it white with existing paint. I also had the Big Guy take the doors off the closet. Then, he repainted the walls to match the room, reinstalled the shelf and existing closet rod and assembled and put in the drawer set. I hid storage containers behind the rocking chair, and put my nicer looking ones on the shelf above. I also moved the rocking chair to in front of the closet in order to make room. It had been shoved in a corner where there was no room to use the ottoman. Taking the doors off the closet allowed me to put the rocking chair slightly inside the closet, making more room!
Pretty spiffy for a free closet makeover, amright?


[…] @ Retired by 40! writes I Did a FREE Weekend Closet Makeover – I needed to remodel the closet, but had not money to work with. Find out how I made it […]